On the day we tried tose dresses we realised that the white dress is a bit transparent, so we bought a special skirt which goes under the dress and dont allow it to be transparent.
Friday, 27 October 2017
Trying on the costumes
As we ordered our costumes online, it was important to than check them and try them on before the actual shooting day. This is because if something would be wrong or not the way we wanted it to be we would have time to change it. As it was hard to contact our artist every time we needed to try something on, we found a friend who lives in the same boarding house who has similar sizes. Here are the pictures that we have made when we were trying costumes:
Thursday, 26 October 2017
Rehearsal with the artist
We decided to meet with our artist to check how well she knows the lyrics and make sure that she knows what to do on the shoot day. Firstly, we explained the whole idea to her. We gave her the costumes she that we chose for each element. We asked to try them on and send us the pictures. This way we would be sure that the dresses fit well.
After that, we played Chasing Highs for couple times and asked Tea to play her role.
Wednesday, 25 October 2017
Filming Roles
Media production is social collaboration which requires a division of labour-specialised skills in order to manufacture the right shots in getting the correct representation of the star image for the 'pop promo' and single release.
Here is how we decided to divide roles between our group:
Andrew will be the Director of element 2, Set 3.
I will be Camera person for element 2, set 3.
Andrew will be the Camera person for element 1, Set 1 and 2
Dora will be the Director of element 1, Set 1 and 2
I will be Director for element 3, set 4 and 5
Dora will be Camera person for element 3, set 4 and 5.
Art direction will be a matrix role, of whoever is watching the set (camera person, director, floor manager) and can be taken by anyone, as we all planned the art direction together
Ya Fei will be Floor manager throughout the day.
This plan will allow each of us to be a director and cameraman on the shooting day.
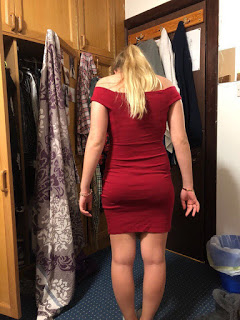
I decided to be a director of the third element as I already made a research into the costumes and make up for these sets and looked into similar products. Therefore, I am already familiar with the shots we want to make and going to be more skilled for it. This element is not very complicated and hopefully, I am well prepared and going to cope with all difficulties which are going to arise on the day. I already know which shots I want to make and the shot list will probably help me to remember them on the shoot day. The only thing I am worried about is how our artist is going to communicate with the guy that we are shooting together her with. At this point, they both said that they alright with it, but on the actual shooting day they may be too shy.
Another my role is a camera person for element 2. In my opinion, I am going to be the best person from our group for this role because I was a dancer myself for 10 years and I know which shots are better to be taken. Andrew will know the dance more as he is working closely with the dancers so working together should produce a good piece of work.
Here is how we decided to divide roles between our group:
Andrew will be the Director of element 2, Set 3.
I will be Camera person for element 2, set 3.
Andrew will be the Camera person for element 1, Set 1 and 2
Dora will be the Director of element 1, Set 1 and 2
I will be Director for element 3, set 4 and 5
Dora will be Camera person for element 3, set 4 and 5.
Art direction will be a matrix role, of whoever is watching the set (camera person, director, floor manager) and can be taken by anyone, as we all planned the art direction together
Ya Fei will be Floor manager throughout the day.
This plan will allow each of us to be a director and cameraman on the shooting day.

Another my role is a camera person for element 2. In my opinion, I am going to be the best person from our group for this role because I was a dancer myself for 10 years and I know which shots are better to be taken. Andrew will know the dance more as he is working closely with the dancers so working together should produce a good piece of work.
Tuesday, 24 October 2017
How to edit your music video
Today we had a lesson about how to edit a music video. We recapped all the things we learned last year and found out even more.
We are going to use the same programme as last year: Adobe Premier Pro.
There are 5 main steps that we have to follow when editing:
We are going to use the same programme as last year: Adobe Premier Pro.
There are 5 main steps that we have to follow when editing:
- Sync everything up
- Do performance cut
- Do Narrative cut
- Add effects
- Do colour grading
The screen in this software divided into 4:
The bottom right is a timeline on which we actually edit the video, on the bottom left we have all the footage that we have. This footage is shown on the left upper screen and the footage from the timeline is shown on the upper right screen.
The first step is synchronizing and to do that when we are going to shoot, we well firstly show an iPad with the number (timing of track) on it displayed. So we will need to sync the number on iPad, with the number of song on the timeline. This called picture sync. When the video synchronized and dragged to the timeline, we need to cut its sound, as the only sound we need is music. It is important not to choose the first numbers and the one you choose should be definite. The last step is to double check if the music and video are in sync.
If for any reason it is impossible to do picture sync, you can do a sound sync. To do that you need to play the rush and listen to the deep bass drum. Then we need to find on what second it exactly starts and mark the rush in. Then we need to find exactly that drum in the playback on the timeline and synchronize them. Double check at the end.
After synchronizing each of the clips it should be renamed with what was shot and how. For example close-up of a right hand on guitar.
After renaming and syncing a duplicate should be made. You should also do a duplicate and rename it everytime a big change takes place.
There are four main rules when editing:
- Listen to the music and illustrate what the song is doing. That will illustrate the idea better and will look like an actual music video, not a slideshow.
- The first time the singing starts you have to show the led singer. This will introduce the artist.
- Group your shots together. The shots that are following each other should be relevant as the whole picture has to make sense. For example, showing the close up of an artist and then a close up of hand playing the guitar won't make sense as it would seem that artist is playing the guitar.
- Cut to movement (graphic movement edit). This will increase the quality of the video to high standards.
To cut something you should press the space bar where you want to cut it, then C to use a razor blade, V will turn it to normal arrow again and then will allow dragging the video to timeline.
Here are some tips for organizing the editing process:
- Use a drawing plan beforehand that you stick to. In that plan, it is possible to sort out which elements are introduced at what time. This will also exclude misunderstanding inside the group and make the production more efficient.
- Don't look at the whole thing, just edit one bit at a time. It is a good tip to edit 10 seconds at a time, but make it the best 10 seconds ever existed!!!
- Go for the best video, rather than a rough cut. Nobody likes to redo stuff, so it is better to do everything to the best standards from the beginning.
Monday, 23 October 2017
What is on the album cover and why (research into similar products)
I was looking into album covers of the artists who are similar to our artist. That was a pop genre. I wanted to outline what do they have in common.
Basically, the whole artwork is always done in the same style and similar colours. I took to albums of different artists: 1989 by Taylor Swift and "Younger Now" by Miley Cyrus.
This album cover is done in more pastel colours and looks like polaroid photo. The main thing on the cover is the artist herself, however, we cannot see her face properly. We can also see album name in bold and artist's initials. On the back, on the background, we can see the face of an artist which is actually the same picture as in the front. On the back, there is also a tracklist, barcode, executive producers names, record name and label.
Basically, the whole artwork is always done in the same style and similar colours. I took to albums of different artists: 1989 by Taylor Swift and "Younger Now" by Miley Cyrus.
This album is done in very bright and cheerful colours which certainly draws attention to it. On the front cover, we can see the name of the artist, an artist herself, album name on the jacket which is not straightforward and the record label name. We can also see the titles of the song on the front cover around the circle. On the back of the album, there is just a tracklist.
This album cover is done in more pastel colours and looks like polaroid photo. The main thing on the cover is the artist herself, however, we cannot see her face properly. We can also see album name in bold and artist's initials. On the back, on the background, we can see the face of an artist which is actually the same picture as in the front. On the back, there is also a tracklist, barcode, executive producers names, record name and label.
Sunday, 22 October 2017
Production Schedule
Here is a plan for our shooting day. This will hopefully save our time on the actual shooting day as we will know what we need to do.
Saturday, 21 October 2017
Call Sheet
This is a list of telephone numbers and emails of everyone who participate in our music video. This makes the communication much easier and if we will need to contact anyone we could do it much quicker.
Subscribe to:
Posts (Atom)